Rope Treatment

OK so you’ve bought your first rope and now you want more and more and more….

I decided to bulk buy and treat my own. I did a bit of reading to come up with a good method of dying the rope…

Steps

  1. Choose and buy your bulk rope. I went for 50m of 6mm Jute from ebay, kicking myself later as I could have got 100m of 6mm Jute from AliExpress.
  2. Get a big pot to cook in! I managed to get a 12L stock pot from ebay for about £15, its cheap and nasty and would be terrible for making food in but should be perfectly adequate for dying bondage rope!
  3. Cut your rope to length and whip the ends. I went for a white cotton for the whipping in the hope that it would pick up the dye and go a similar colour to the rope.
  4. Burn off the fluffies. Run a lighter over your rope to take off the fluffy bits…. then after 10 minutes switch to doing it over the gas stove as its way easier. My whole house smells a bit smokey now after doing 50m of rope so you might want to do it outside on a camping stove.
  5. Boil (simmer) the rope to soften it. Simmer and stir it occasionally for 1 hour.
  6. Tip out into the sink
  7. Dissolve the dye in 500ml of hot water (I used two lots of dye in a liter) in a separate container.
  8. Fill the pot back up with hot tap water (hot as it gets)
  9. Add the salt and stir thoroughly
  10. Tip in the dye
  11. Chuck in the rope and work it for 15 minutes
  12. Leave the rope fully submerged overnight.
  13. Stretch the rope out to dry, I tied it around the rungs of a ladder
  14. Work coconut oil into the rope to soften it and make it oh so smooth! (Other oils are available)
£15.74 –
https://www.ebay.co.uk/itm/12-Litre-Deep-Mirror-Polished-Stainless-Steel-Casserole-Dish-Pot-Stockpot-Lid/253606319407?ssPageName=STRK%3AMEBIDX%3AIT&_trksid=p2057872.m2749.l2649
£2.59 –
https://www.ebay.co.uk/itm/50g-PACK-DYLON-FABRIC-CLOTHES-HAND-WASH-DYE-COLOURING-CHANGING-COLOUR-TO-CHOOSE/323257650836?ssPageName=STRK%3AMEBIDX%3AIT&var=512325682646&_trksid=p2057872.m2749.l2649
£13.99 –
https://www.ebay.co.uk/itm/4-X-PACKS-OF-BURLESQUE-RED-DYLON-FABRIC-CLOTHES-DYE-HAND-USE-50g-1-75oz/141271964916?ssPageName=STRK%3AMEBIDX%3AIT&_trksid=p2057872.m2749.l2649
Cut the rope into hanks
Whip the ends
Burn off the fluffies. The hank on top is from the same batch of rope as the pile underneath which has been burned already.
Boiled for an hour, tipped into the sink sorted out the dye (see instructions above) chucked it in, agitated it for 20 minutes and then left it overnight. I then dried it by stretching it around a ladder…… yep fucking good idea if I say so myself. Tie one end to a rung and then wrap it around and around the ladder stretching it tight as you go… the soaking and boiling it up shrink it! Small downside is that while I was patting myself on my back I was so clever thinking of the ladder and being sure that I had taken all of the photos and telling myself I had taken all the photos as I untied and unwound all the rope again later…. I hadn’t, I have no photos of that step. Twat.
This is after I’ve rubbed a lot of coconut oil into the rope…. too much, so much that its died and solidified into white chunks again on the rope making it blotchy,

I’ve been working the rope and practicing ties and that’s all gone now and its looking fine!

OK so that went way better than expected! Usually version 1.0 of my projects is pretty good and I have a shite load of ideas and improvements for version 2.0…. this time I’m trying to document it really well as I’m going to do the same thing again.

So this first 50m cost me….

  • £16.45 – 50m Rope
  • £15.74 – Stock Pot
  • £2.59 – Salt
  • £13.99 – Dye
  • £6.49 – Oil

However after an initial investment I got enough dye and salt to do 100m. Ignoring the cost of the oil as I used too much and hardly made a dent on the pot! I could also have ordered 100m of rope from Aliexpress for the same price

  • £16.45 – 100m Rope
  • £2.59 – Salt
  • £13.99 – Dye
  • Total ~ £35/100m

£35 for 100m! That’s pretty damn good.

Attempt 2

So…… here’s my second run through. At some point I’ll edit this into some simple to follow instructions but what the hell, hear me waffle!

100m of Aliexpress 6mm Jute
There was a couple of places where the rope looks as though it was spliced together… I didn’t like them so I cut them out. This had some impact on the final lengths of rope that I ended up with.

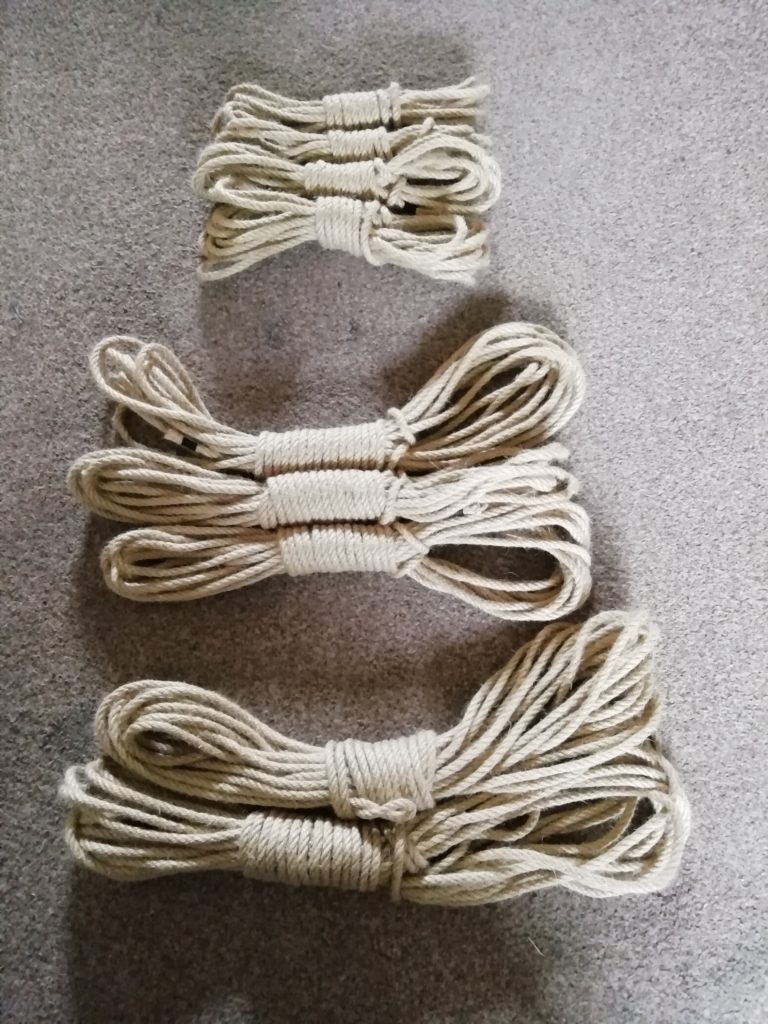
Out of 100m and after a lot of playing i’ve decided that my new ‘standard’ is going to be as follows:

  • 4x 4.2m
  • 3x 10m
  • 1x 15m

This allows me to do a huge range of my ties…… I get annoyed at joining rope when I’m just that little bit short but having trailing excess doesn’t bother me in the slightest! I’m weird that way.

I cut hanks for a complete ‘standard’ in my new chosen colour…. forest green, plus a 15m length of the purple I did last time as I’ve found the lengths I’ve cut are often just a little short for some of the chest harnesses.

Hanks cut to length, plus a little bundle of left over!
Ends whipped appropriately. You can’t see from here but all the ends are whipped in black to match the eventual green dye…. except one of the 15m lengths which is whipped in white to match the previous batch as its going to be purple.

There should be something here about burning off the fluffies…. I used a hob, you draw the rope through the flame…. you regret not opening the windows earlier as it smells.

Simmer the rope for an hour, agitating it occasionally and checking it is all submerged.

Tip it all out into the sink.

Dissolve the salt in water

Dissolve the dye in warm water

dav

Agitate the rope in the water for at least 15 minutes and then leave it overnight!

Tip it all out into the sink

Run water over the rope as you agitate it until the water starts to run (fairly) clear and most of the excess dye is off.

Chuck the rope into a pillowcase and put it through the the washing machine. I used a mixed load setting with washing powder but no softener.

Then you need to stretch out the rope as it dries, put a decent amount of tension on the rope. It took a couple of days for mine to dry out.

sdr
dav
Dry and off the ladder

The next phase is to oil or wax the rope. I used coconut oil. Get a blob of oil in your hands and then run the rope through it… then run the rope through your hands over and over until the oil is soaked in and you have callouses.

Head to oil

The you’re done…

Finished and hanked

Here’s a comparison of the finished rope against the completely untreated rope… the treated one feels so much softer.

Untreated vs treated and dyed

…And here’s a tie with my nice new green rope!

Pentagram chest harness, 6mm Jute

Rope Workshop

Here is a list of my standard ties. This is a growing list so is no longer manageable as a single page to look at. If you are trying to get started in rope bondage then they are in a pretty good order to follow (so far!).

I’ll add a caveat to this before we start. Rope bondage is dangerous. I’ll not go over safety here but make sure you do wider reading to cover it. It is easy to tie someone in a way that can result in permenant nerve damage. Check out my resources page for links to more responsible and complete sites and sources that do cover this!

  • Zip Tie - This is a tie that can be pre-made and looped and tighten around a limb at a later date. The knot of the zip tie can be slid up and down the rope tightening or loosening the know but will not tighten or loosen under tension. You can attach one to each corner of the bed before your night even starts.
  • Single Column Tie - This is a basic tie to comfortably tie around a single trunk (wrist, torso, ankle, thigh, chair leg...). The multiple wraps provide a wider band of rope to share pressure across, reducing the amount that the rope cuts into the trunk.
  • Midshipman’s Hitch Knot - This is another sliding knot, similar to the zip-tie, that can be loosened or tightened without slipping under tension. This one is simple to tie while the other end of the rope is tied off somewhere else.
  • Two Trunk Tie / Two Column Tie - A really simple way to tie two trunks (ankles, wrists, torso-to-wrist, ankle-to-wrist, ankle-to-thigh, ankle-to-banister...) together. The multiple wraps help to spread the load and reduce the amount that the rope cuts in.
  • Braided Wrist Tie - A decorative wrist tie (can also be done on the ankles). This is decorative only as it binds around the wrist where there are exposed nerves so in avoiding pressure on them the rope is often slack enough to wriggle out of. ....but it is pretty!
  • Joining Rope - So... you've run out of rope. Now what? Here are a few techniques for joining rope. Some are better than others depending on the bite/tooth of your rope and if you want the old working end in line or poking out. Have a play and learn their differences.
  • Pentagram - A nice decorative chest harness. A pentagram to signal your wicked intent! Please note that the rear photo here is really neat.... don't expect yours to be that neat without a lot of practice. There is a specific order to tie and loop things in the back knot but explaining how would make this tutorial a hundred times longer for only a minor benefit! Try it yourself and see how neat you can get the back.
  • Chest Harness and Chest Harness with Bling - A simple decorative chest harness. There are a few options below on adding steel hardware into the tie.
  • Using Up Excess Rope - When doing chest ties and you often end up with excess rope or a leash at the back. This is a simple way to neatly use up that rope if you don't want it flapping about.
  • Woven Chest Harness - I love this tie! A woven criss-cross of rope at the front and and almost spine like weave at the back. Its intricate, uses a metric-fuck-tonne rope and is a pain in the arse to get the tensions right in the rope, but it looks gorgeous front and back if done correctly.
  • Basic Hip Harness - This is the first step towards suspensions! This is something that you can tie on yourself but you should be comfortable with this tie and get first-hand in person advice and instruction on this before progressing to any form of suspension.
  • Diamond Body Tie - A full body decorative harness that runs around the torso, front and back, and under the crotch.
  • Heart Chest Tie - A simple decorative chest harness with a heart design in the center of the chest.
  • Burlington Bowline - This is a slight change on the previous single column tie, with an extra wrap to make it more secure. Still with a wide band of rope around the wrist to stop it digging in and a knot that will not slip and tighten.
  • Sommerville Bowline - Another single column tie, this is my favourite so far as it doesn't slip, the knot is smaller than the Burlington bowline. It is a little more complex to explain but once you've got the hang of it then it is more simple to tie.
  • Hitch Chest Harness - This is yet another simple chest harness this time with a couple of hitches at the front. I do a lot of these as they are easy to practice on a mannequin (#longdistancegirlfriend)
  • Hishi Karada -

    There is a more simple version of this tie further up - https://charredhalo.co.uk/diamond-body-tie/.

    This one is based on the tutorial by Rory's Brainworks so I won't go into much detail here on how to do it.